Blog Archives

Set date and time on a Linux command line

You can set date and time of a linux server with:

date +%Y%m%d -s "20131228"

which sets the date to the 28th of December in 2013.

date +%T -s "20:15:45"

which sets the time to a quarter past 8 PM (and 45 seconds).

If you set the system datetime, you can also set the hardware clock:

hwclock --systohc --localtime

Change Maven repository directory within Eclipse

If you use the embedded Maven installation within Eclipse, the default .m2 directory (which contains the repository) resides in the profile of the current user.

In Windows, this is the C:\Documents and Settings\<user> directory. A large repository there could result in problems with server based profiles. Is there a quota on the server, it could be not possible to save the profile back to the server, if it contains a lot of Maven artifacts.

You can set the repository directory within the settings.xml. Copy the .m2 directory into another path on your computer (outside of your profile). Edit the settings.xml and set a new path to your repository:

  <!-- localRepository
   | The path to the local repository maven will use to store artifacts.
   |
   | Default: ~/.m2/repository -->
  <localRepository>C:/arothe/.m2/repository</localRepository>

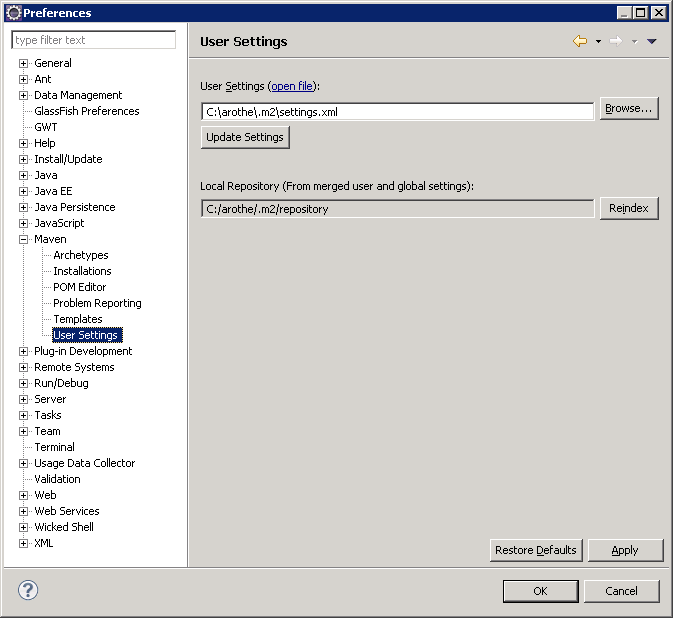
Enter Eclipse Preferences and change the User Settings path. Click on “Update Settings” and the Local Repository should be changed to the path defined within your settings.xml. Click on “Reindex”.

Eclipse Maven Settings

Last but not least, delete the .m2 folder from your profile directory.

Change version for GWT application

In Eclipse are different places where you can change the version of your web application.

1. Your pom.xml
Change the version of your artifact like:

<groupId>de.uni_leipzig.smo</groupId>
<artifactId>trialregistry-gui</artifactId>
<version>0.3-SNAPSHOT</version>
<packaging>war</packaging>

2. Your build path
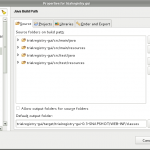
Set the default output folder to something similar to your pom.xml:

Build Path Settings

3. Your Run configuration
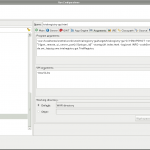
To run GWT applications you define a Run configration within Eclipse. The tab “Arguments” contains also a path to the war-directory, which could contain the version number:

Run Configration

Use a simple shell within Eclipse

The WickedShell project provides a shell view within Eclipse to execute some scripts or programs. It is very simple to execute a Maven build within this shell instead of opening a terminal window from the Linux desktop. Very cool!

http://www.wickedshell.net/

GWT Compile and wrong output dir

If your “GWT Compile” process exports the “deploy” directory to the wrong place, you can correct this within the preferences file com.google.gdt.eclipse.core.prefs, which you can find within the “.settings” directory of you Eclipse project.

eclipse.preferences.version=1
jarsExcludedFromWebInfLib=
lastWarOutDir=/path-to-your-project/src/main/webapp
warSrcDir=src/main/webapp
warSrcDirIsOutput=false

Change the “lastWarOutDir” to the correct path. It should contain the “WEB-INF” directory and GWT should create a “deploy” directory within it. Restart your IDE to load the new settings! You can check the results during “GWT Compile” with log level TRACE.

Problem with DescriptorEventAdapter and EJBContext

If you have an AuditListener for your EclipseLink entities, you may have a problem to get the name of the current user at this level. You could use the InitialContext.lookup("java:comp/EJBContext") method, but it fails on my application. Another way is to use a servlet filter.

Define a filter class within your web.xml:

	<filter>
		<filter-name>PrincipalServletFilter</filter-name>
		<filter-class>de.uni_leipzig.smo.acltest.server.filter.PrincipalServletFilter</filter-class>
	</filter>

	<filter-mapping>
		<filter-name>PrincipalServletFilter</filter-name>
		<url-pattern>/*</url-pattern>
	</filter-mapping>

Implement a singleton enum, which stores a ThreadLocal variable to hold the current principal object.

public enum PrincipalSingleton {
	INSTANCE;

	private ThreadLocal<Principal> principal = new ThreadLocal<Principal>();

	public Principal get() {
		return principal.get();
	}

	public void set(Principal user) {
		this.principal.set(user);
	}
}

Set the current principal within the filter.

public class PrincipalServletFilter
	implements Filter {

	@Override
	public void destroy() {
	}

	@Override
	public void doFilter(ServletRequest request, ServletResponse response, FilterChain chain)
		throws IOException, ServletException {
		PrincipalSingleton.INSTANCE.set(((HttpServletRequest) request).getUserPrincipal());
		chain.doFilter(request, response);
	}

	@Override
	public void init(FilterConfig config)
		throws ServletException {
	}
}

And finally use the principal within your audit class.

	private Principal getPrincipal() {
		return PrincipalSingleton.INSTANCE.get();
	}

Recursively delete .svn directories

rm -rf `find . -type d -name .svn`

Adding a web-server’s certificate to Java’s keystore

When you try to connect a secured website, you will need the server’s certificate within the keystore of Java. If you don’t have it, you will get a sun.security.provider.certpath.SunCertPathBuilderException because of an invalid handshake between server and client.

To solve that task, you can get the certificate from a webbrowser (like FireFox). Open the page security properties and export the certificate as *.PEM (Base64 encoded DER certificate) without the certification authorities. Store the file into your filesystem on <cert-path>.

Check your Java installation and login as user, which has write access to <java>/lib/security/cacerts.

Execute
keytool -import -file <cert-path> -alias <cert-name> -keystore <java>/lib/security/cacerts

The <cert-path> is the path to your saved certificate, <cert-name> is an alias for the certificate, you can use the webserver’s domain. The default password of the keystore cacerts is changeit
You will get the information about the certificate and at the end answer the question with yes.

If you have already used the alias within the keystore (i.e. with an old certificate), you can use

keytool -delete -alias <cert-name> -keystore <java>/lib/security/cacerts

to remove the old certificate.

Now, the Java application is able to connect the secured website. Double-check the used installation, sometimes your application uses its own JRE or another version on your filesystem.

Renew a self-signed certificate with Eisfair

Go to Service Administration->Certs Service->Manage certificates. The script provides a menu to select the certificate and the its operations. Choose the certificate (1), like webserver or mailserver. Choose option 11 to renew the certificate request. Follow the screen output. Select 12 to sign the request with the CA certificate. Choose option 14 to create a new certificate and to copy it on the right place. Restart your webserver or mailserver process (/etc/init.d/).

If you have one certificate for multiple namebased hosts on your webserver, you shouldn’t select option 12. Instead follow the instructions on this blog entry: .

Events

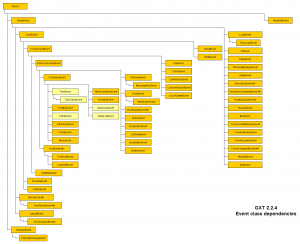
There are a lot of events within GXT. I have created a class-overview.

Sometimes I ask myself, which event I will get from a widget and which listener I have to use.

Follow these steps:

  1. Go to the documentation of the class, which is the event source (i.e. Grid)
  2. Look for the right event (like CellClick)
  3. You will see, that CellClick generates a GridEvent. GridEvents can have a generic type, which is related to the ModelData displayed within the grid.

  4. Go to enumeration Events. Choose the right EventType (Events.CellClick)
  5. There are also events like On***. These events are DOM events (browser events). You can also listen to OnClick, but you won’t get high level information like ModelData.

  6. Implement a listener class, which implements the interface Listener
  7. Because the CellClick event type generates a GridEvent, our listener should implement Listener<GridEvent>. There are some special listener like DNDListener which provide additional empty methods for some event types related to special field (like drag&drop). But it is always possible to implement the Listener interface and split the events on their types without any helper classes.

TreeStore<ModelData> store = new TreeStore<ModelData>();
// listen to all events
store.addStoreListener(new SpecialStoreListener());
// or 
store.add(Events.Store.Add, new BaseStoreListener());
store.add(Events.Store.BeforeClear, new BaseStoreListener());
store.add(Events.Store.Sort, new BaseStoreListener());
public class SpecialStoreListener extends StoreListener<ModelData> {
   // override the provided methods as needed
}
public class BaseStoreListener implements Listener<StoreEvent<ModelData>> {
   public void handleEvent(StoreEvent<ModelData> evt) {
      if (e.getType() == Store.Add) {

      } else if (e.getType() == Store.BeforeClear) {

      } else if (e.getType() == Store.Sort) {

      }
   }
}

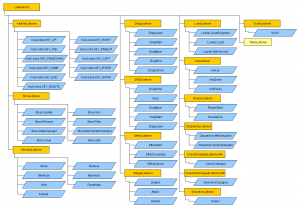
As you can see, you will have always methods to register a special listener (i.e. store.addStoreListener() instead of store.addListener()). But it is not documented, which class can use such a listener. You have to look into the outline of each class. I have created a listener overview, so you can check the supported EventTypes for each listener.